Easy Fall Eyes with Maybelline

Today's shop has been sponsored by Collective Bias, Inc. and its advertiser. As always, all opinions are my own. Thank you for supporting the brands that make this blog possible! 
#FalsiesPushUpDrama #CollectiveBias

You guys! I walked into Walmart in search of one thing (the new Maybelline Falsies Push Up Drama Mascara) and ended up with so much more. With that being said what better time than now to share my super easy fall look. Great for those "I'm already late" mornings.

So yes, this is my signature fall look.

walmart.jpg

If you're looking for the New Maybelline Falsies Push Up Drama Mascara - look for this sign! But before you head there make sure you make a list of the products I used so you can also recreate my fall look (they should all be in that aisle too).

maybelline-haul.jpg

And here's the loot I came home with! Now you're not going to use everything here but just wanted to share, you know, beauty junkie to beauty junkie.

image.jpg

Alright, now let's get started! I've already completed my base including blush and highlighter but left everything in my eye's vicinity bare. That means no mascara, eyeshadow, or eyebrow pencil. Pretty scary right? I don't want to scare you guys any further so let's get started!

Step 1: FYI, all these shades can be found in Maybelline's Blush Palette. SO GOOD and SO AFFORDABLE. Shade your lid with the lightest color. This will give you a base to build off of. If you notice I went pretty light and made sure it was even throughout the lid. For this color I blend out and up towards my brow bone.

step1.jpg

Step 2: Blend the next color into your crease (shown in photo below). I also blended a little bit of the dark brown shade at the end of my eyelash line.

step2.jpg

Step 3: Take the shimmery gold color and sweep it over your entire lid but stay underneath the crease. From there I blend out and soften up the brown in the crease. Blending is your friend here.

step3.jpg

Step 4: Line your lids. I used the Lasting Drama Gel Eyeliner in Blackest Black and gave a tiny swoop up at the end of my lash line.

Step 5: Frame your face. For this I used the Brow Define + Fill duo pencil. First you lightly pencil in your brow and then us the other end to fill in with brow powder. Super easy to use which is why I highly recommend it!

Step 6: Apply Maybelline Falsies Push Up Drama Mascara. This is the world's first ever push up brush with cup-shaped bristles that scoop, coat, and lift lashes. So with that said let every bristle glide smoothly onto your lashes dramatic lift of 45 degrees. Use two coats for more intensity.

image.jpg
step4-5-6.jpg

Step 7: Once your lashes are charged up and volumized, apply a berry hue (I'm wearing Maybelline's Color Sensational in Blissful Berry), shake out your hair and head out to conquer the world.

easy-fall-makeup-look.jpg

You can't even tell that I took less than 10 minutes creating this look right?

I'm kind of a walking disaster when it comes to applying false lashes so I'm really excited that Maybelline was able to recreate the same effect in their new Falsies Push Up Drama Mascara I think they did an amazing job with the formula. I mean look at my lashes when I first started and look at how dramatic they look now. This is a definite keeper in my makeup bag!

When in a time crunch I can never leave without having my brows filled in or mascara. What about you?

Five Friday Favorites

You guys, my kitchen cupboards are brimming with product I can't wait to tell you about that I may just up my Friday Faves to a weekly thing. But then, there's the issue of time and how little I have. That's the conundrum that I'm in. I could also stop buying everything I see in Target/online - but, that would be too easy.

org-skincare-mineral-peel-face.jpg

1. ORG Skincare Mineral Peel Face
The first time I heard about this Mineral Peel I absolutely knew I had to try it. I'm currently on a Retina-A routine which means lots of dry skin and peeling. It's so not sexy but it's the only thing keeping my acne at bay. Another thing I love was my ability to create a smooth surface before any makeup application. If you're dealing with dry skin and hate seeing the flakes underneath your makeup - pick this up and give it a try. It does take some getting used to, so I'd highly recommend using it on a slow day when you have time to play around it. And if you're really curious watch a few YouTube videos on how others are applying it.

carols-daughter-hair-milk-review.jpg

2. Carol’s Daughter Hair Milk (on the left)
This isn't your average leave-in conditioner, it's more of a leave-in moisturizer. The rich cream hydrates every single curl on my head which is a great thing BECAUSE it means my curls are less likely to frizz up. With the threat of frizz being absent I haven't used any sort of gel or hairspray (bye crunchy curls!). My hair feels soft to the touch and stronger + the scent is pretty amazing. I find that using less product is best for me and I've been able to hold onto the bottle for a month. Plus, the pricing is very affordable and there are no parabens.

via Facebook

via Facebook

3. EVA NYC's Flat Iron
I've started getting into the habit of treating myself to monthly blow-outs and mani-pedis - it's been such a game changer in lifting up my mood. (Sidenote: I encourage all of you to find a nice way to treat yourself once a month. It's okay to put ourselves first especially when we work hard). I tend to keep my blowouts for at least five days, so dry shampoo and a flat iron are key. Besides the fun design, I found that the EVA NYC hair heats up quickly and the ceramic plates are gentle on my strands. With the price set at $50, this makes for a pretty great gift too for those hair savvy gals in your life.

hairiette-review.jpg

4. Hairiette Co-Wash
I'm still on board with co-washing. Hairiette Co-Wash cleans my hair but without stripping the moisture from my curls. Fun fact, this line was created by Tanya Wright, a cast member from Orange is the New Black. The co-wash is made with all natural ingredients like Kokum Butter and Marula Oil + smells amazing. I went through the jar within three weeks - so pretty good when compared to other brands I've used. On top of that, this made it really easy to detangle my curls with my fingers which I always have a tough time doing.

via Facebook

5. Pixi Skintreats Glow Tonic
I've been hearing about this for a while now, and finally got the chance to try it. You guys, I'm obsessed with this and it really does live up to all the "Holy-Grail" hype. It's alcohol-free (which is a must when it comes to our skin), my previous acne scars have started fading, my pores have gotten tighter (after use), and one exfoliating swipe gets my skin so smooth. In my regimen (when given the time) I use the ORG Skincare Mineral Peel Face first and then swipe my face with the Glow Tonic. If time is tight, I only use the Glow Tonic. The light rose scent is also amazing, but I'm biased towards rose-scented goods.

How To Wear Sweatpants to Work

On Thursdays (and a few other days that end in ‘y’) I reach for the ultimate lounge pants - sweatpants. Yas girl, we lounging today.

cute_winter_office_outfit_ideas.jpg

Even though there’s no lounging taking place at work, wearing sweatpants anywhere is pretty much THE best. For reference, I sit all day so avoiding that irritating red mark around my waist (maybe I should be pantless?) is kind of key. The only problem I can find (and it’s a pretty big one) is that sweatpants are a huge office no-no. Unless… it’s worn right.

do-everything-cuffed-pant-lucy.jpg

I’ve been wearing this Lucy pair particularly to my AM Classpasses and found a loophole that benefits us all.  Plus, the fewer things I carry on my commute the less hate and shade I’ll get from other straphangers. (This shirt tends to get a few side-eye rolls but I gotta share the PSA).

lucy-says-relax-tee.jpg
black-tumi-backpack-review.jpg
jogger_outfit_ideas.jpg

There’s enough slouch in these pants that I can wear my Hatha shorts (underneath) on the way to class, remove these, and then wear (and relax in) the sweats all day after.

If you’re curious, it’s all in the footwear and fabric of what you choose to wear after the sweat session.

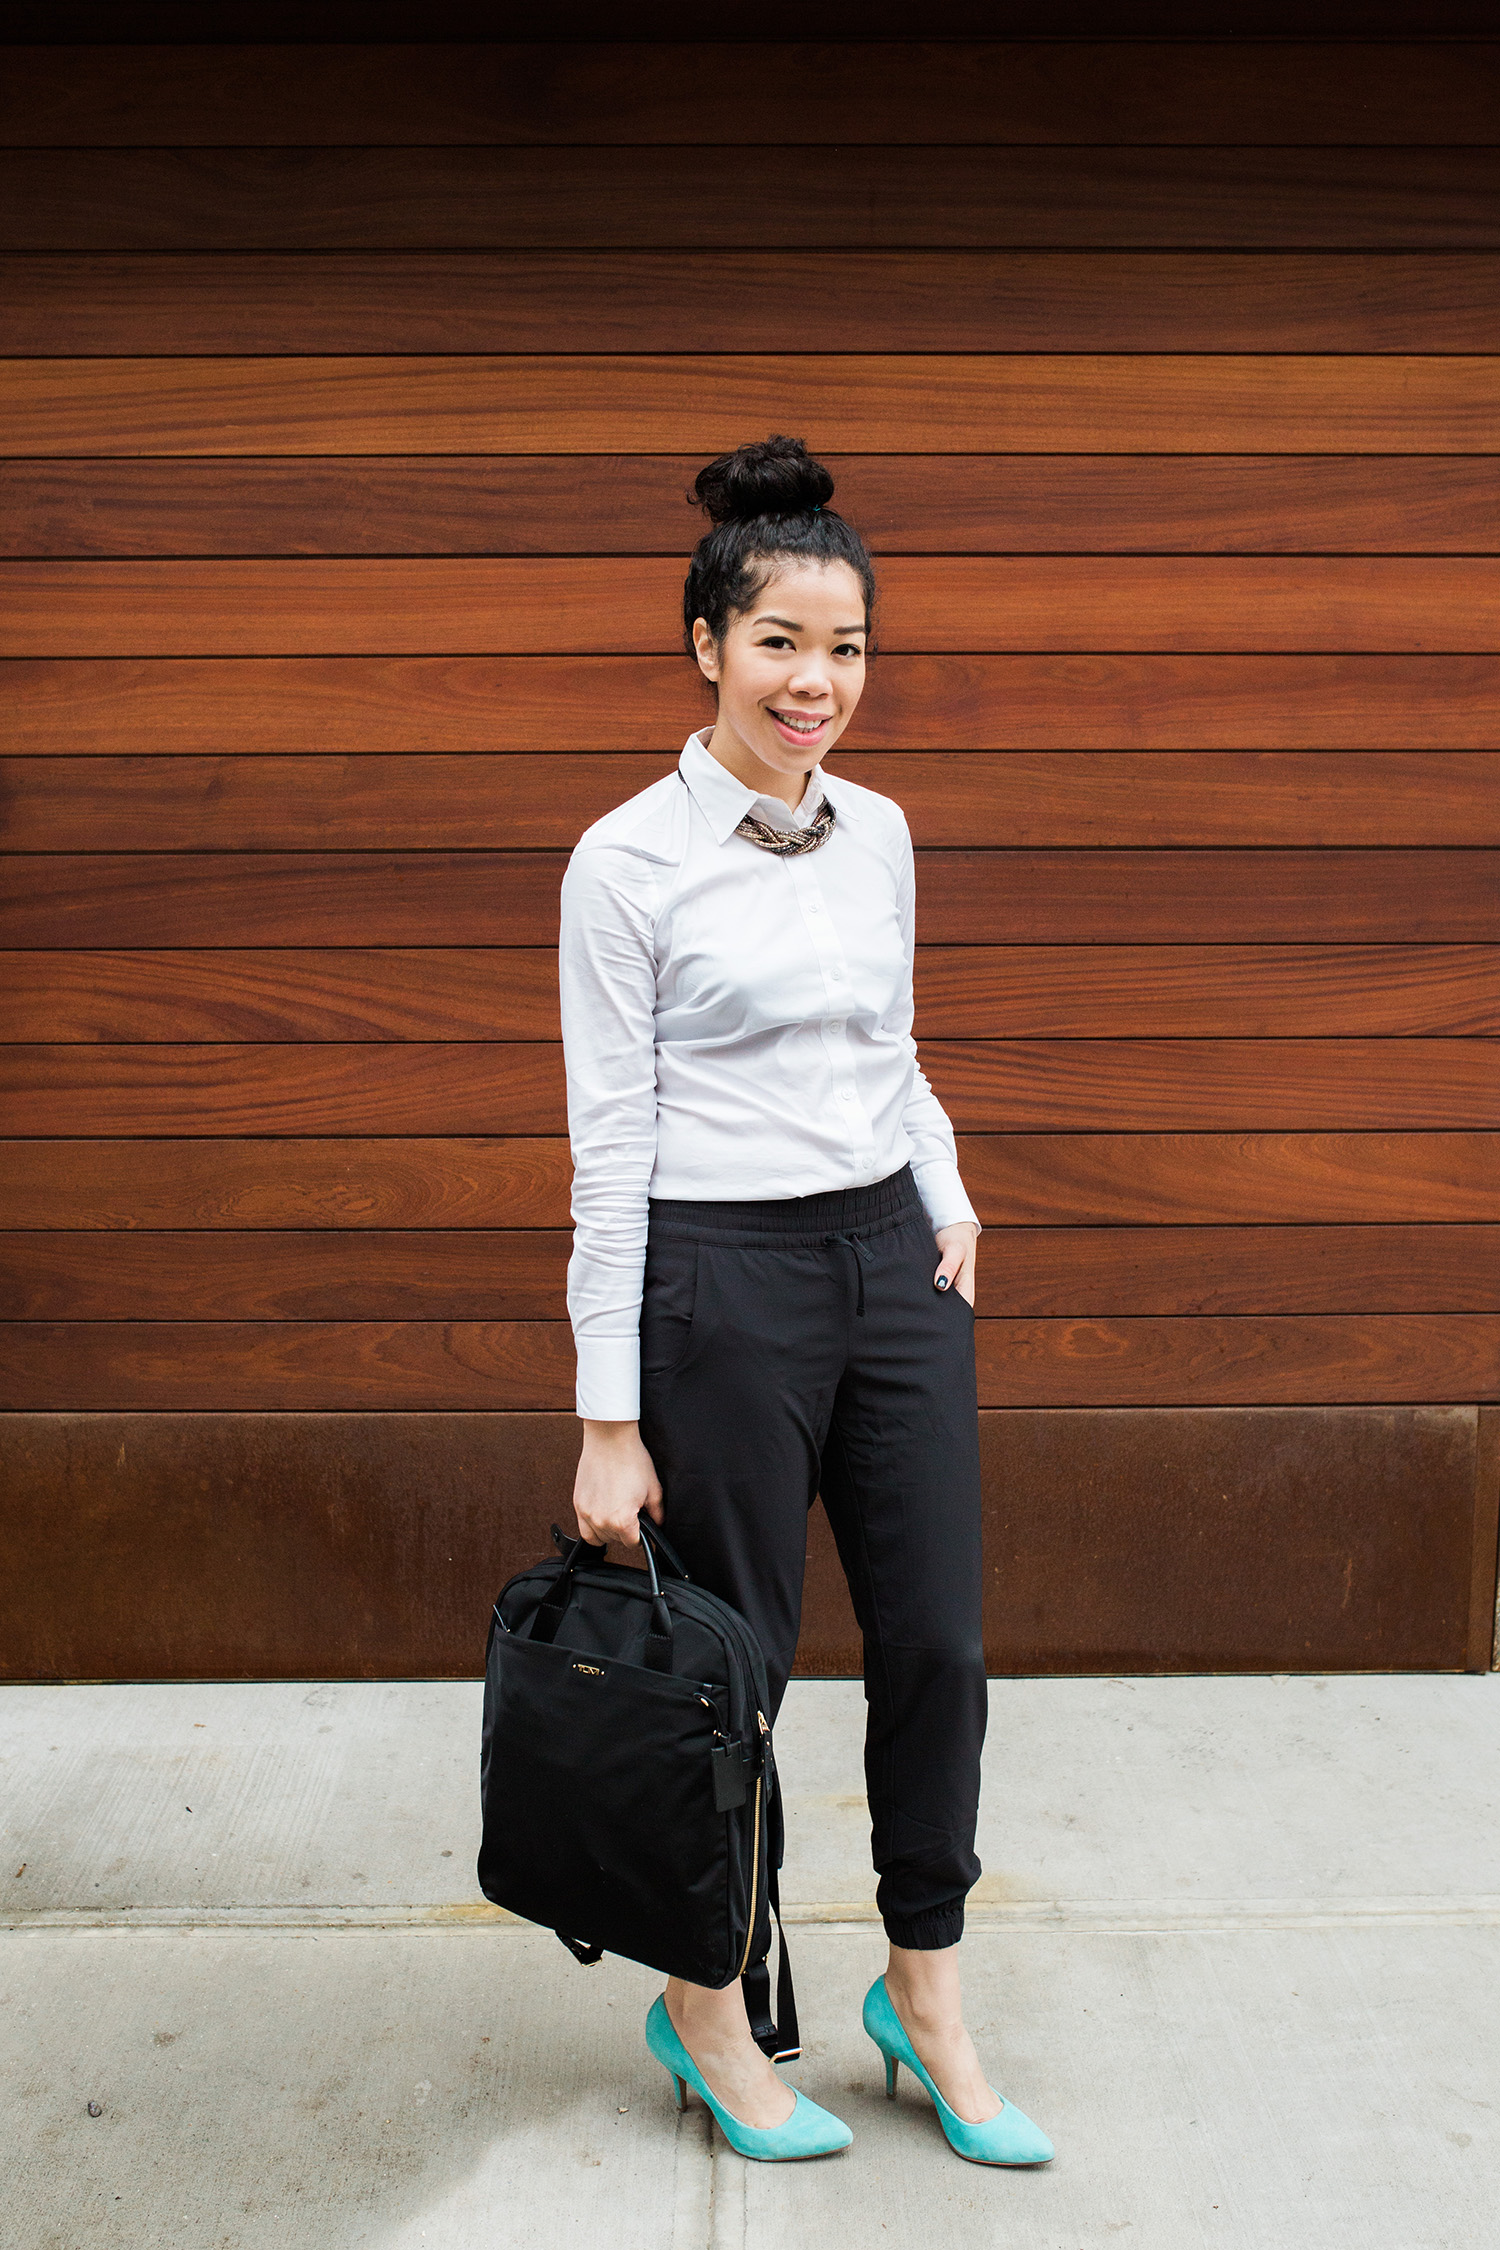
The polyester material in the pants has a nice sheen that makes them a bit more grown up for the office (keep that in mind when shopping). I also switch out my sneakers (when worn) to a cute pair of heels or booties and wear a white button-down top. This top is my fave since it doesn't wrinkle when packed.

curly-hair-updo-office-style.jpg
slim-tumi-backpack.jpg
how_to_wear_sweats_to_work.jpg

Shirt: Ann Taylor  Active Top: Lucy  Pants: Lucy  Necklace: Old (love this tho!)  Heels: Old (similar)  Backpack: Tumi  Lipgloss: Juicy Apple via TonyMoly

I love black & white but it can feel a little school-uniformish, so I went with these blue suede shoes (my tried & true favorite). And of course, a little bit of bling.

Also, if you have not tried the Y7 yoga studios around NYC/LA, you should (on Classpass of course). I’ve been hitting their space weekly and it’s such an awesome way to start the day.

Photos by Lydia Hudgens.

Shop the look: